


In a completely random move, I began baking Australian-style plain scones at home here in Taipei about a month ago. My quest was to perfect a recipe using as many local ingredients as possible.
Why? Because I got into the habit of eating scones with jam and cream when I visited Sydney last month and I wasn’t interested in starting a long-distance relationship with scones after I left.
Another reason why I started baking scones was simply because I could.
What may surprise people who don’t live in Asia is that it’s pretty rare to have a full-sized oven at home. There’s not much baking in Asian home cooking, and if something is getting baked it’s probably happening in a toaster oven or a medium-sized, plug-in oven.
Well, our current place has a full-sized oven, and I have a huge appetite for scones so here we are. Naturally I made a logo and started an Instagram account @todays_scones to document it all. (The tagline “since this morning” is a riff on how super old bakeries say “since 1903”.)

I’ll admit it’s been really fun and just a little bit therapeutic to suddenly go deep with baking. I love browsing #scones on Instagram to see what’s new and following other fans of scones to see what they’re eating and baking. Yes, I just typed “fans of scones” and I’m loving it.
So the big question: is it possible to use local ingredients to make scones? The answer is almost!
I use a Taiwanese brand of flour named Chiahe, which supplies the world-famous dumpling restaurant Din Tai Fung. I also use Taiwanese milk, eggs, sugar and salt. My Stephen Hawking-level discovery is that local brands of premium drinking yogurt are a good substitute for full fat cream, something that Taiwan doesn’t produce.
On the downside, my recipe uses imported baking powder (the American brand Bob’s Red Mill) and imported butter. Sadly there are no local butter options in the supermarket, and before you ask, no I don’t plan to start hand-churning my butter. The baking powder issue is purely economics. There’s a local brand on the shelf, but it’s such a small pack and ends up costing more than buying a bag of the imported stuff.
The recipe I’m sharing below is a work in progress. I’m constantly tweaking based on YouTube videos and recipes I read online. But basically, you should get a piping hot batch of rustic, plain scones that taste like the ones I’d order from cafes in Sydney with a pot of Earl Grey tea. Good luck!

The ingredients
3 cups plain flour
3.5 teaspoons of baking powder
2 pinches of salt
1 tablespoon of sugar
About 2 tablespoons of cold, unsalted butter
1 large egg
1 cup of full fat, original flavor drinking yogurt
1/2 cup of milk
Directions
Mix the drinking yogurt, milk and egg together first, then set aside. This gives it time to de-chill to room temperature. You should have almost two cups of liquid.
Sift the 3 cups of all-purpose flour and 3.5 teaspoons of baking powder into a large bowl. Then add the salt and sugar. While you’ve got the sifter out, you might as well sift a thick layer of flour onto a clean surface for you to knead and rest the dough on later.
Grab the butter from the fridge and dice as small as you can be bothered to dice it. Put them all into the bowl and pinch into the flour mix. Some recipes say to rub until the dough becomes “breadcrumbs” but that sounds like it would take way too long to do manually. Ina Garten says to get the butter to the size of “peas” but she uses a mixer. I just make sure each piece of butter has been well-flattened.
When your mind, body and soul are all at peace, grab a pair of chopsticks. Scone recipes from Australia typically say to “cut the dough with a butter knife”. Like how you’d deal with tension in the air I guess. But since we’re in Taipei, I use chopsticks. Pour half of the liquid into the flour, then use the chopsticks to stir and lift as if mixing hot noodles in peanut sauce.
The dough should resist the liquid at first, forming large clumps. Add the rest of the liquid and keep mixing until the clumps just start to come together. Then plop it all gently onto the floured surface. There will most likely be dry flour on the bottom of the bowl you need to scape off.
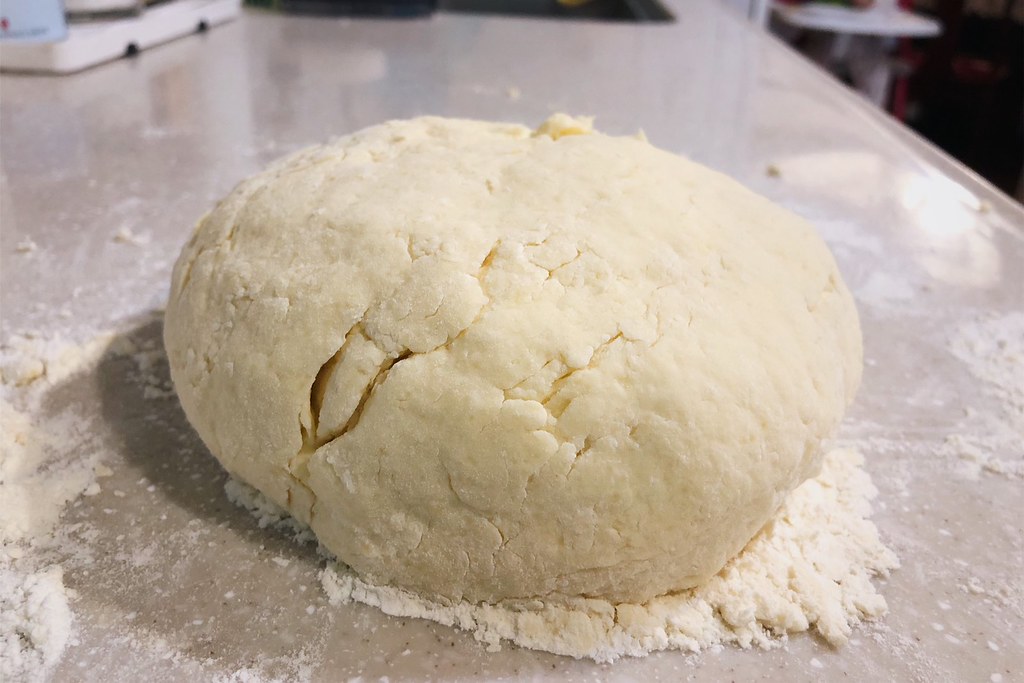
Gather the various clumps and start to ever-so-gently push them together. The texture should be similar to a baby’s wobbly fat thigh. Move the dough onto a fresh section of flour if it’s too wet and floppy to handle. You should only need to knead four or five times until it’s all together.
Once you’re happy with it, let the dough just sit there and do nothing for at least 10 minutes. Now is when I’ll wash my hands and turn on the oven to 180 degrees. Oh, don’t forget to take the baking pan out of the oven so it doesn’t get piping hot! That was a rookie mistake I kept making over and over again.
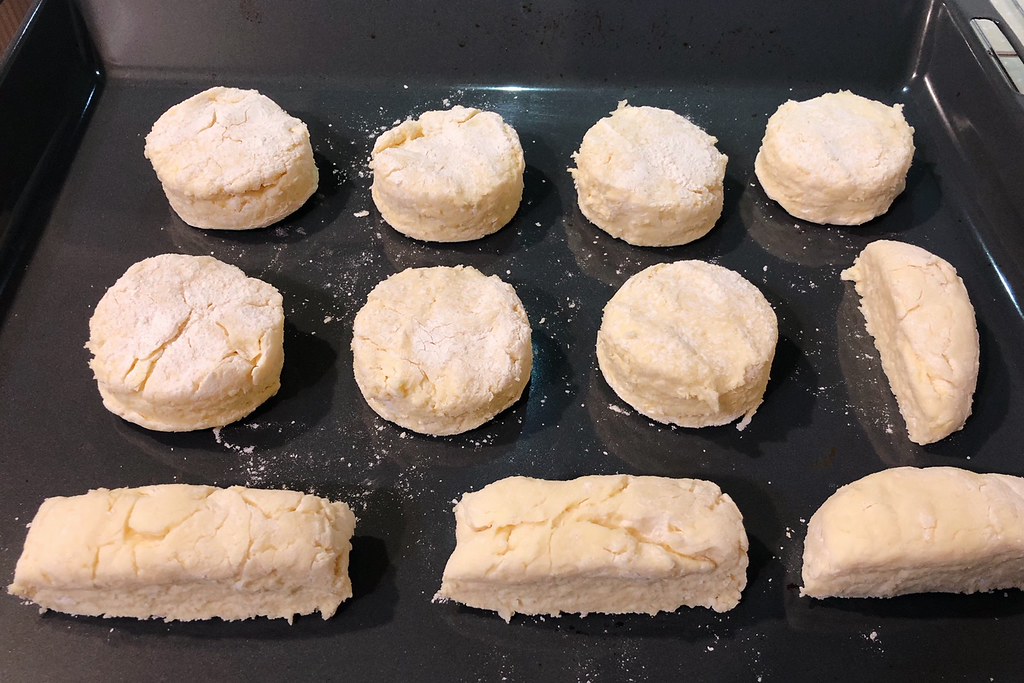
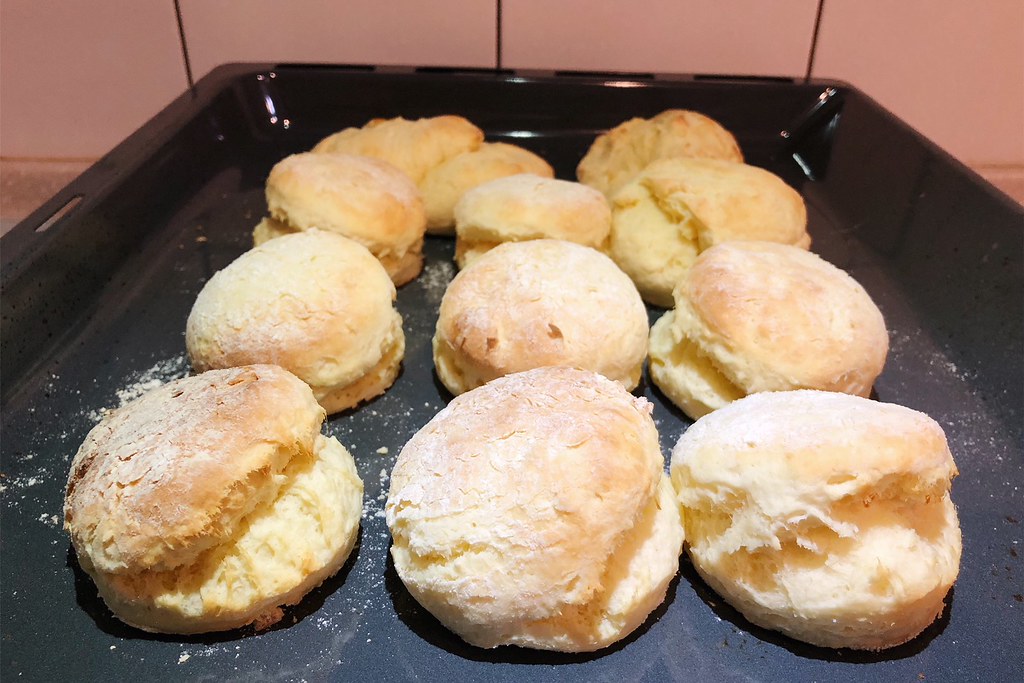
When time’s up, I knead the dough two or three more times before I start flattening it out quickly with my hands. (I don’t have a rolling pin otherwise I would use that.) Then I grab the cookie cutter, tap it into some flour on the counter, and cut out my scones. I can usually get 6 to 8 from the first cut. Then one or two more from the leftover bits of dough. Make sure you place them at least 2cm apart.
The baking pan goes into the second to top shelf of the oven for 15 minutes. Once the tops are lightly browned, take them out and let them cool on a rack. Then you’ll have a fresh batch of scones to tell people about!